Intro
In this post I wanted to document the steps I took to connect my GitHub repo to my person Azure Subscription, and my Entra ID tenant. The goal is to be able to have a GitHub action provision and deploy my blog.
Overview
The big picture looks like this. We’re going to install some stuff, we’re going to set some stuff up, and then we’ll write some code.
- Install requirements.
- Setup Azure
- Setup GitHub
- Write some code.
Prerequisites
Before we begin, we’ve got to install some things, and ensure we have proper accesses to everything.
Make sure you’ve got:
- A GitHub account
- A repo already created, and a local clone of the repo.
- An Azure Account
- Access to Microsoft Entra ID to your tenant with permissions create application registrations.
- You can view some built-in roles at Microsoft Learn permissions reference
If you’re running on Windows 11, and you’ve got winget installed you can install the following dependencies using:
winget install --id "Microsoft.Azd"
winget install --id "Microsoft.AzureCLI"
If you want to dive further into these technologies, check them out here:
These are two distinct tools that serve two different purposes. Combined they are incredibly flexible, and powerful.
Setup Azure
Now that we’ve got everything installed, and we’ve ensured that we’ve got permissions to create application registrations we’ll set up things on Azure first.
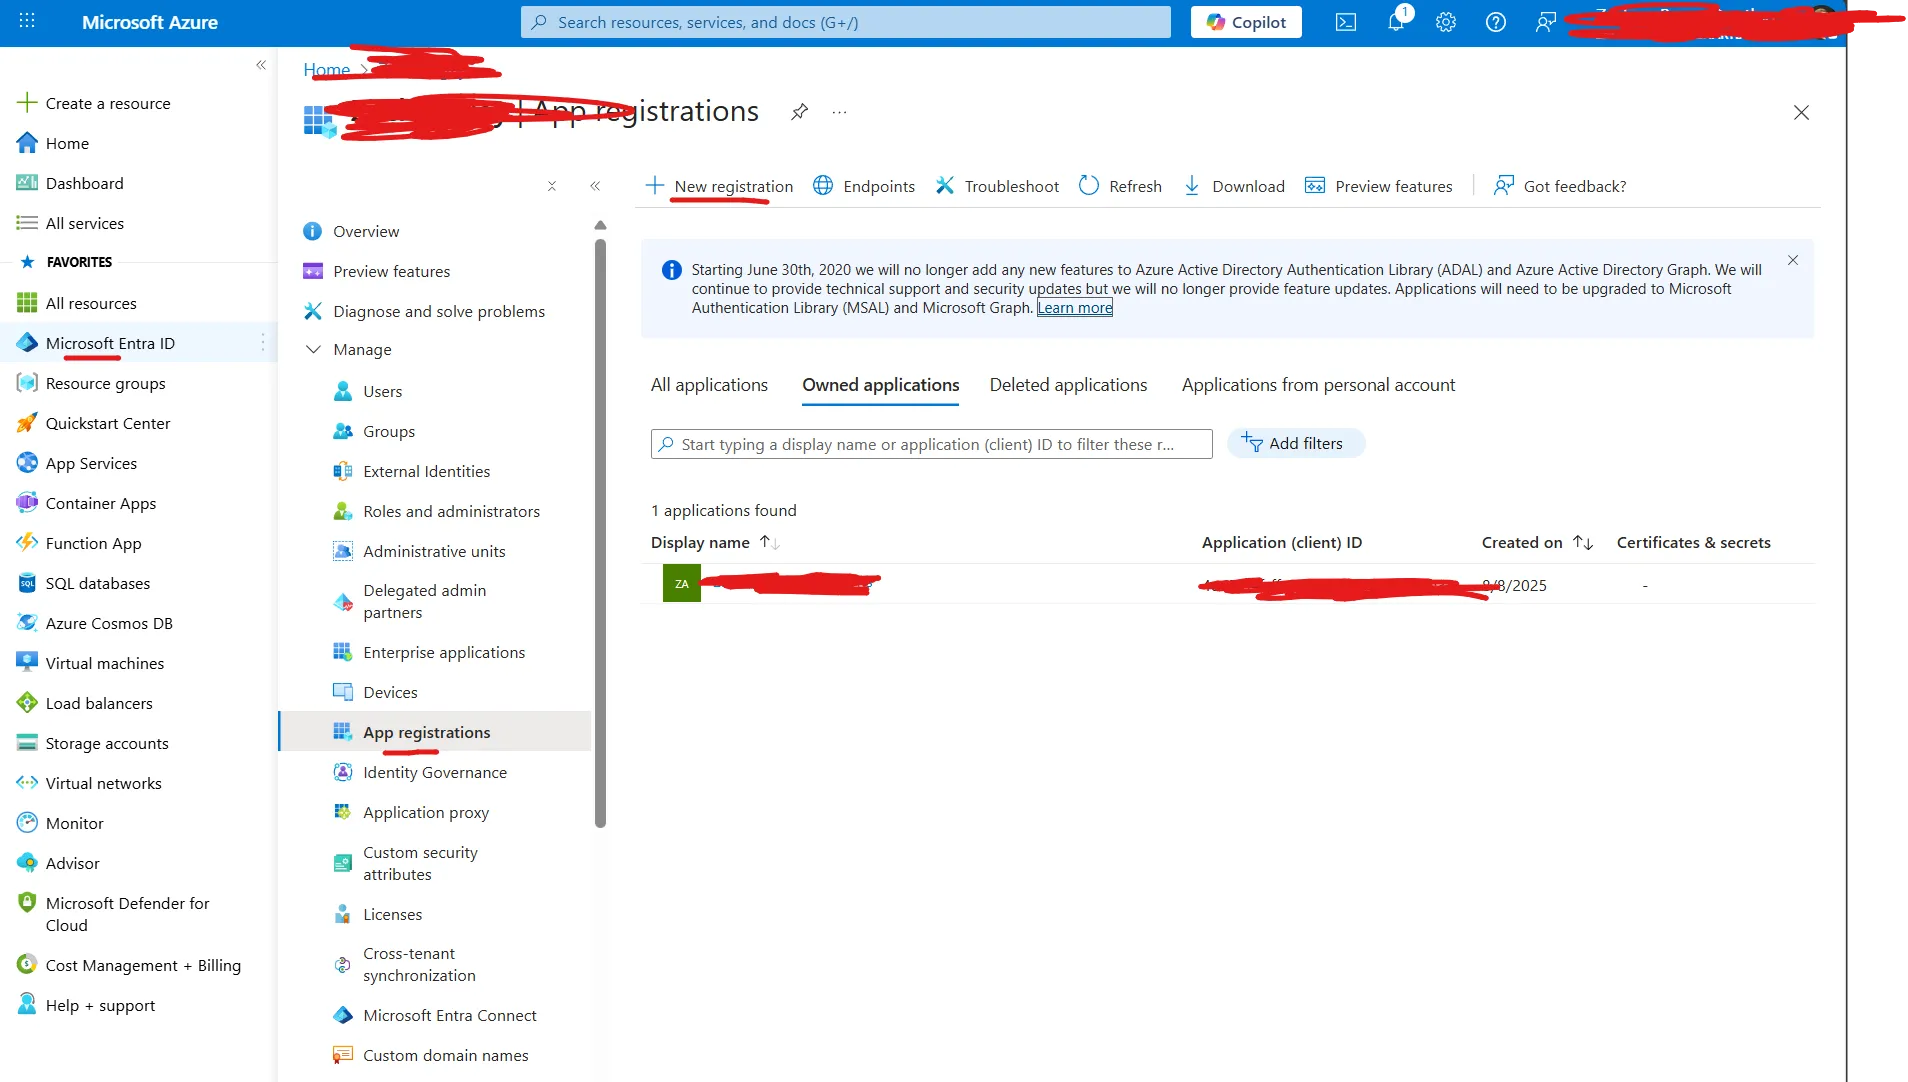
Lets create the app registration logging into the Portal using the appropriate account.
Microsoft Entra ID => App Registrations => Click on ”+ New Registration”
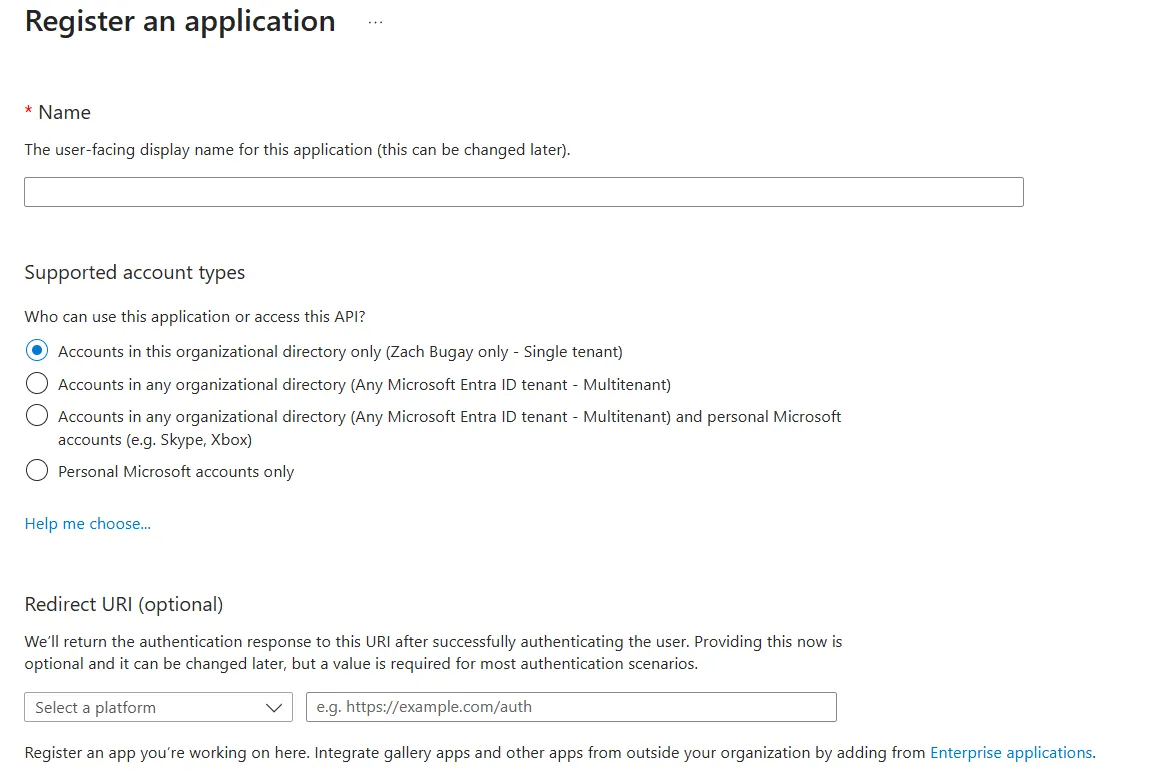
Register the application using any name you want, and select the account type that works best for you. In my example, I used Accounts in this organizational directory only.
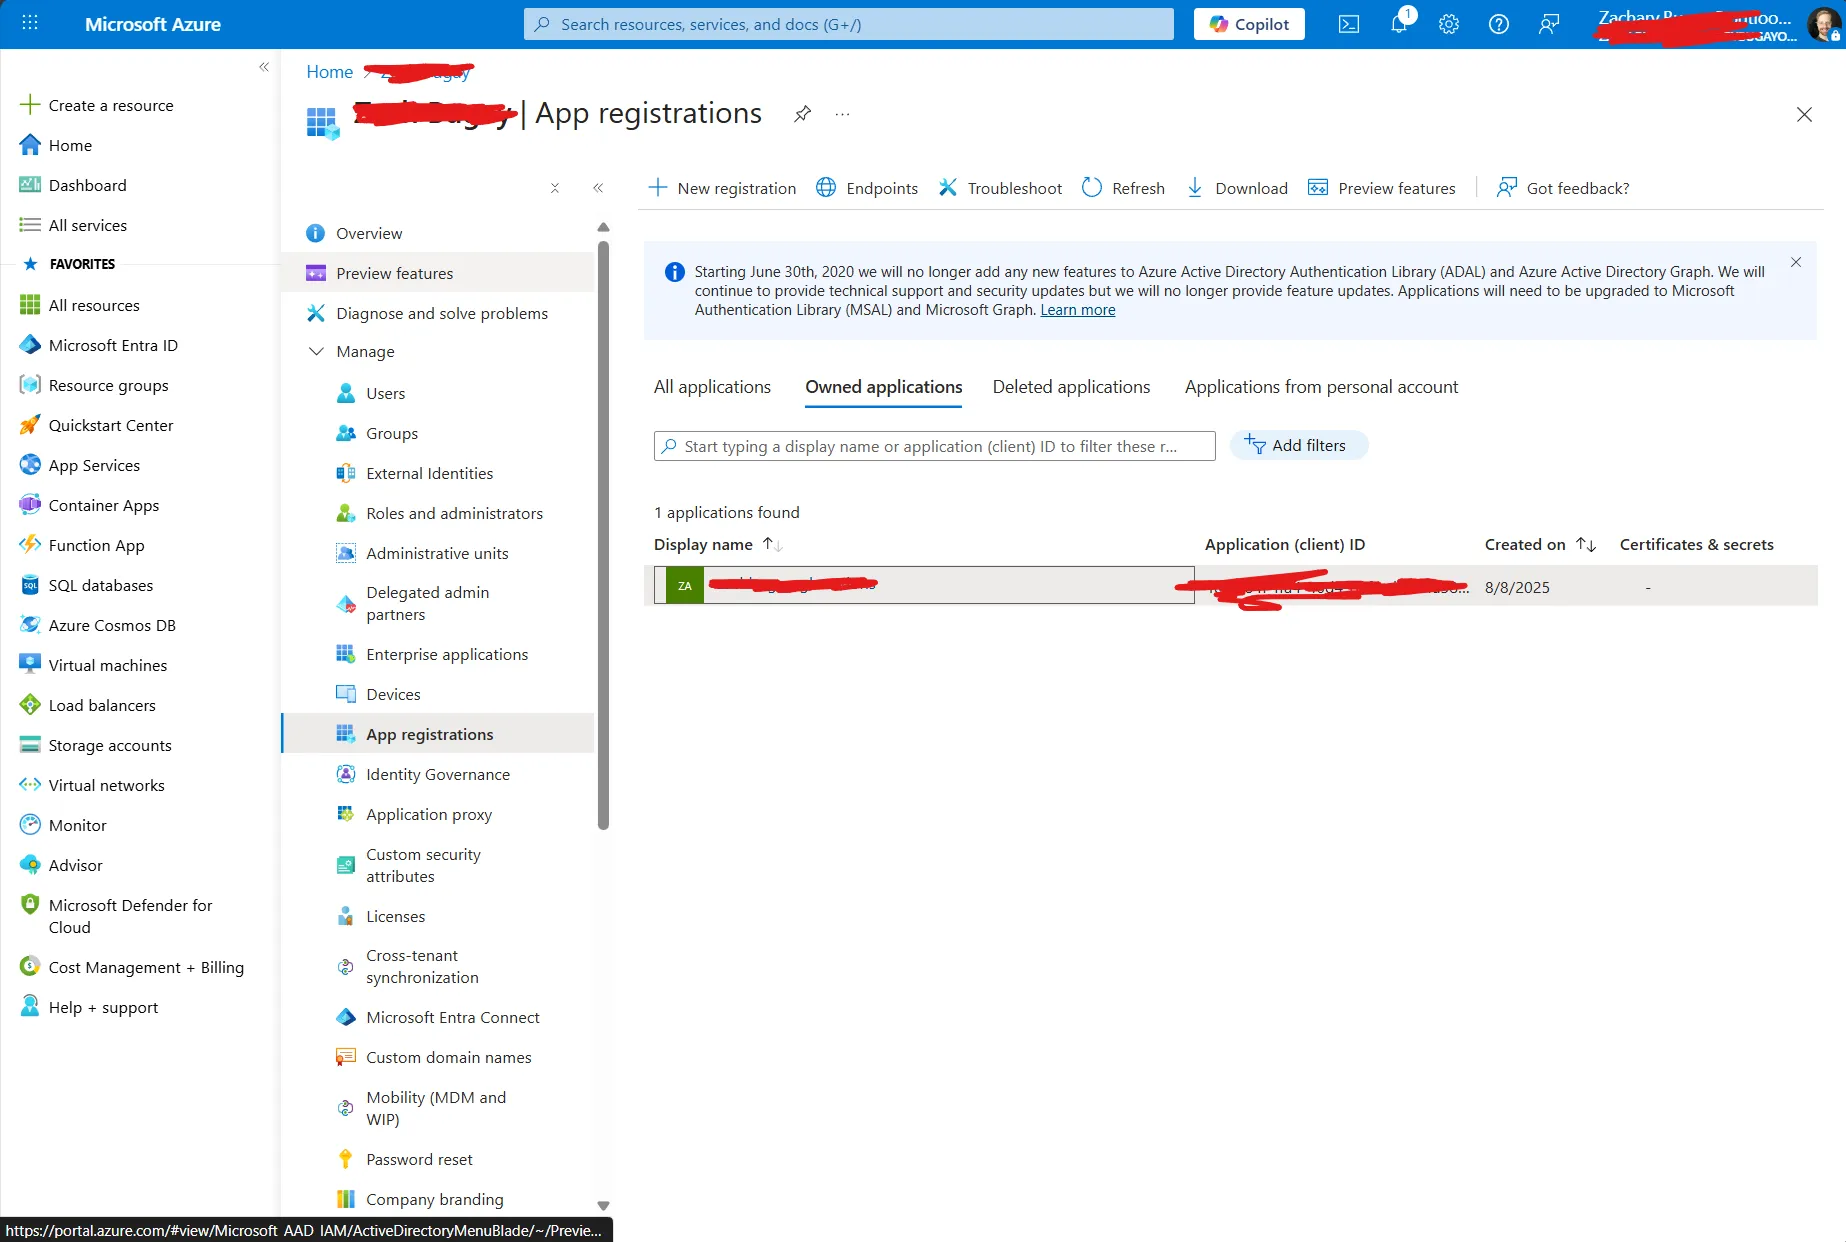
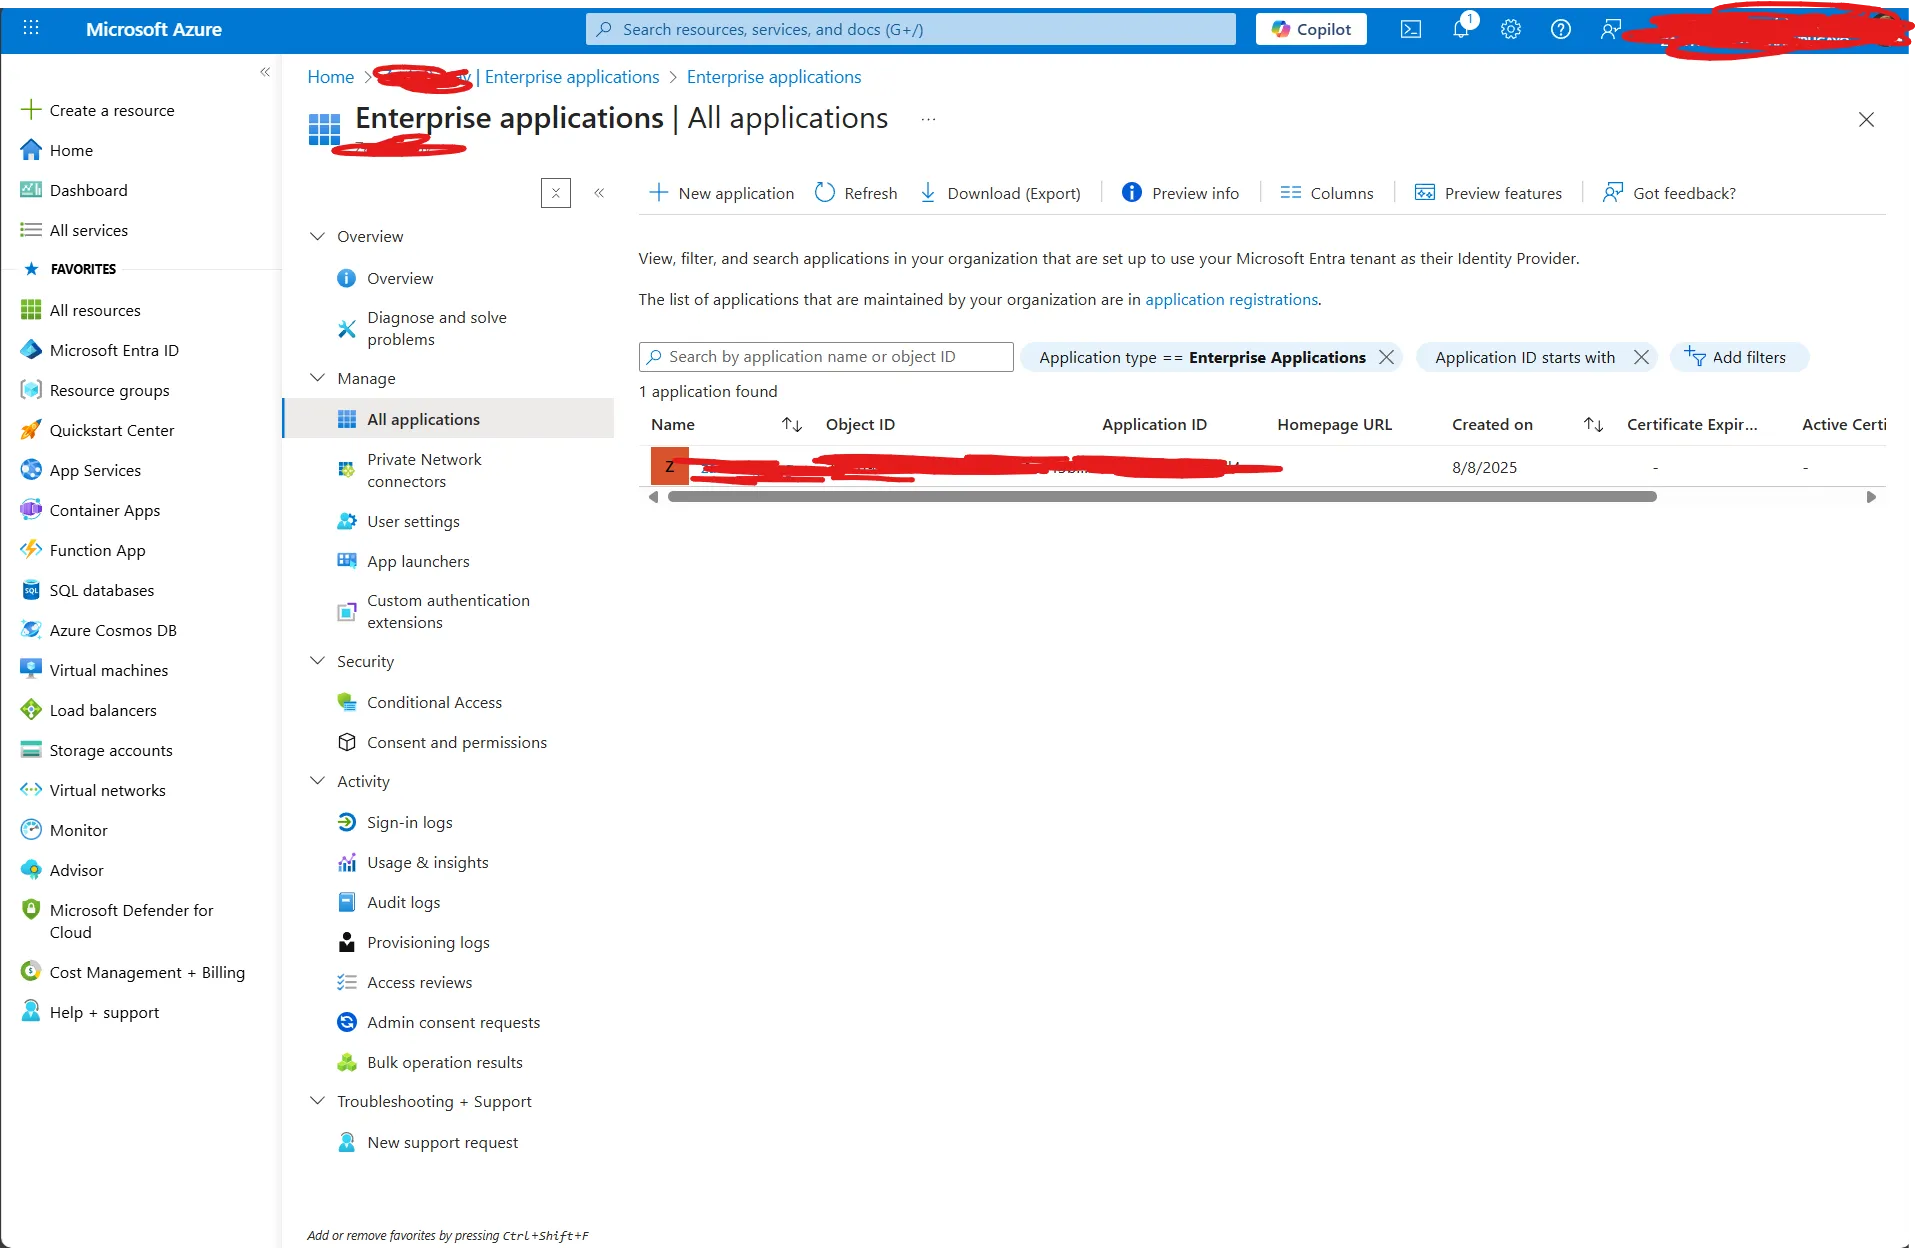
Once the app registration has been created access it through the App registrations blade.
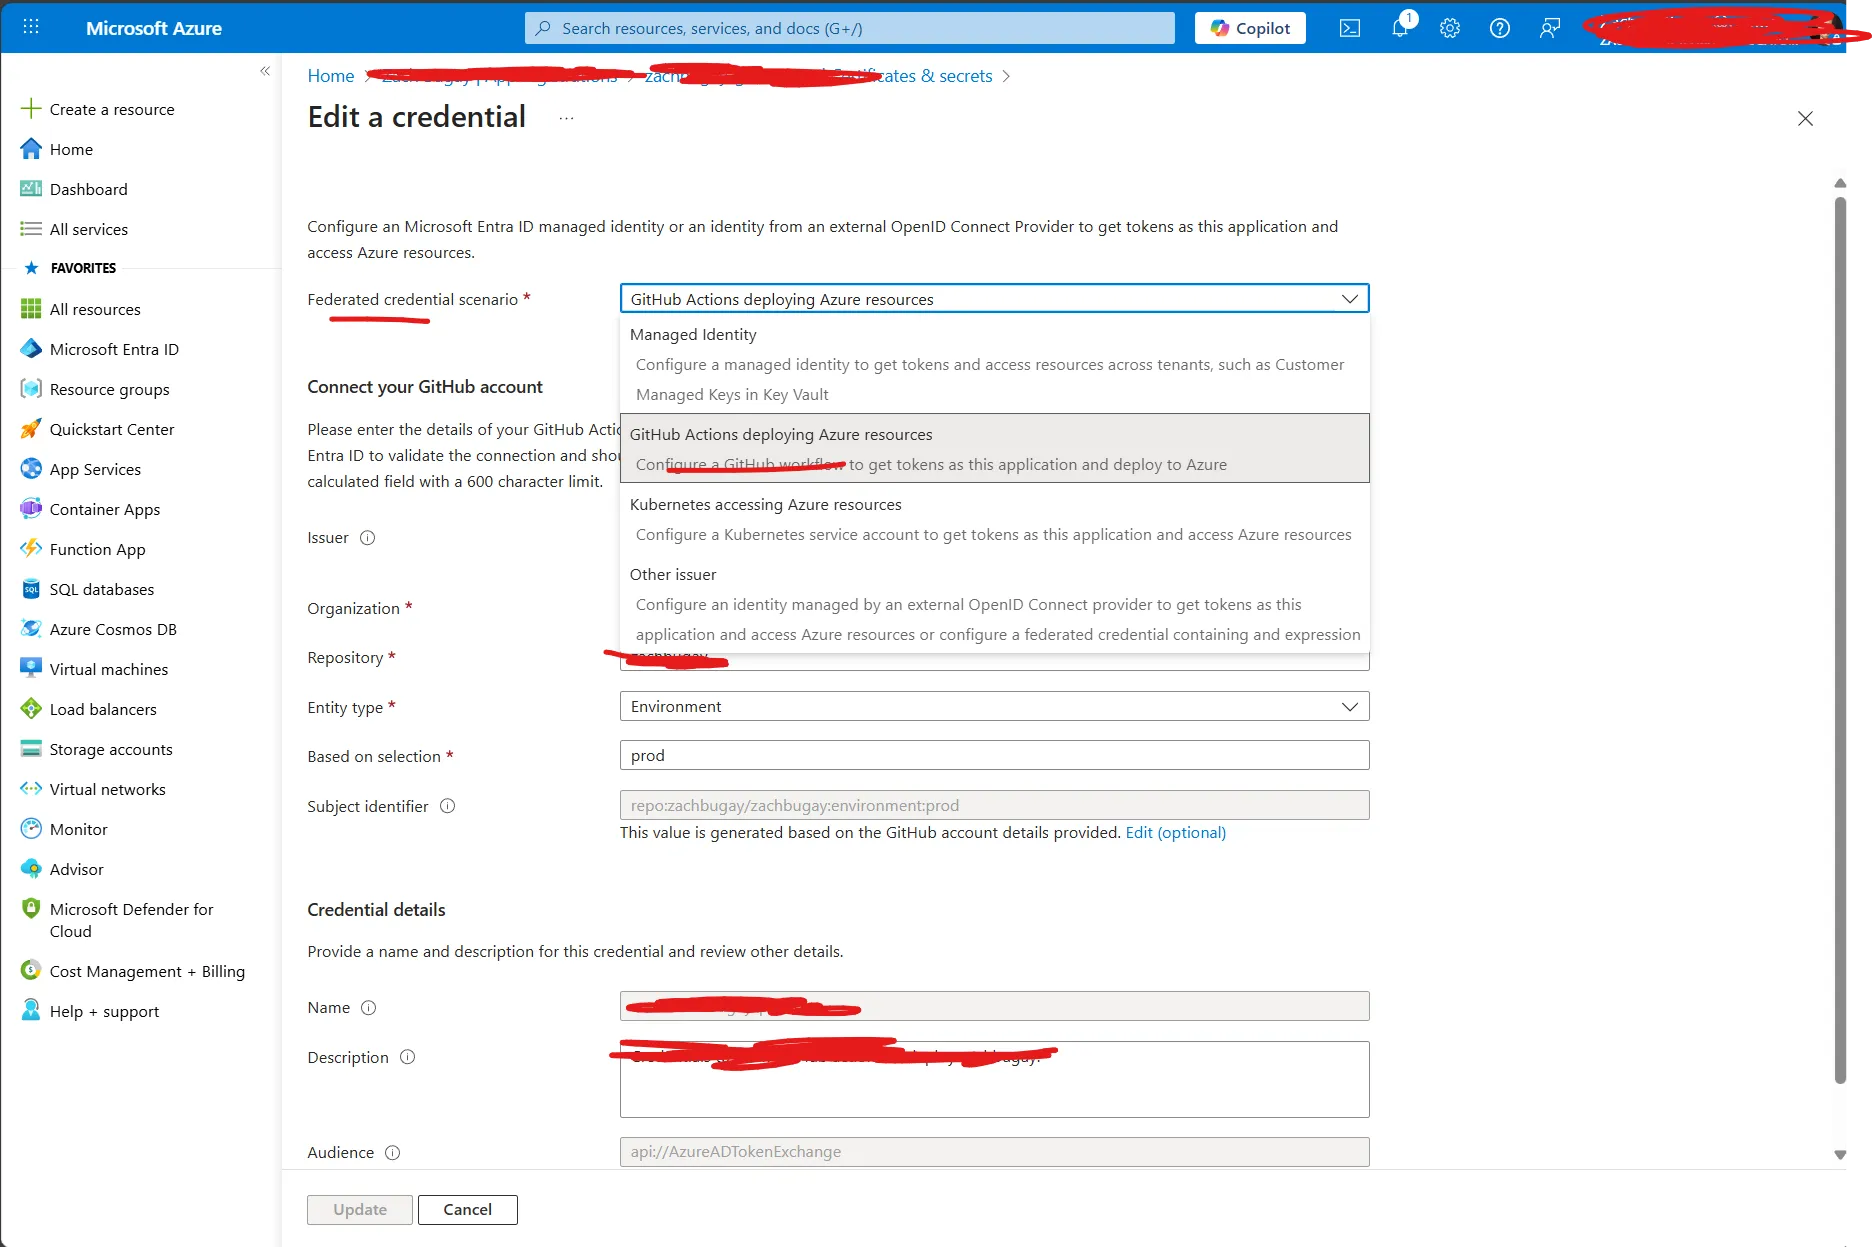
Select “Certificates & secrets” and create a new federated credential.
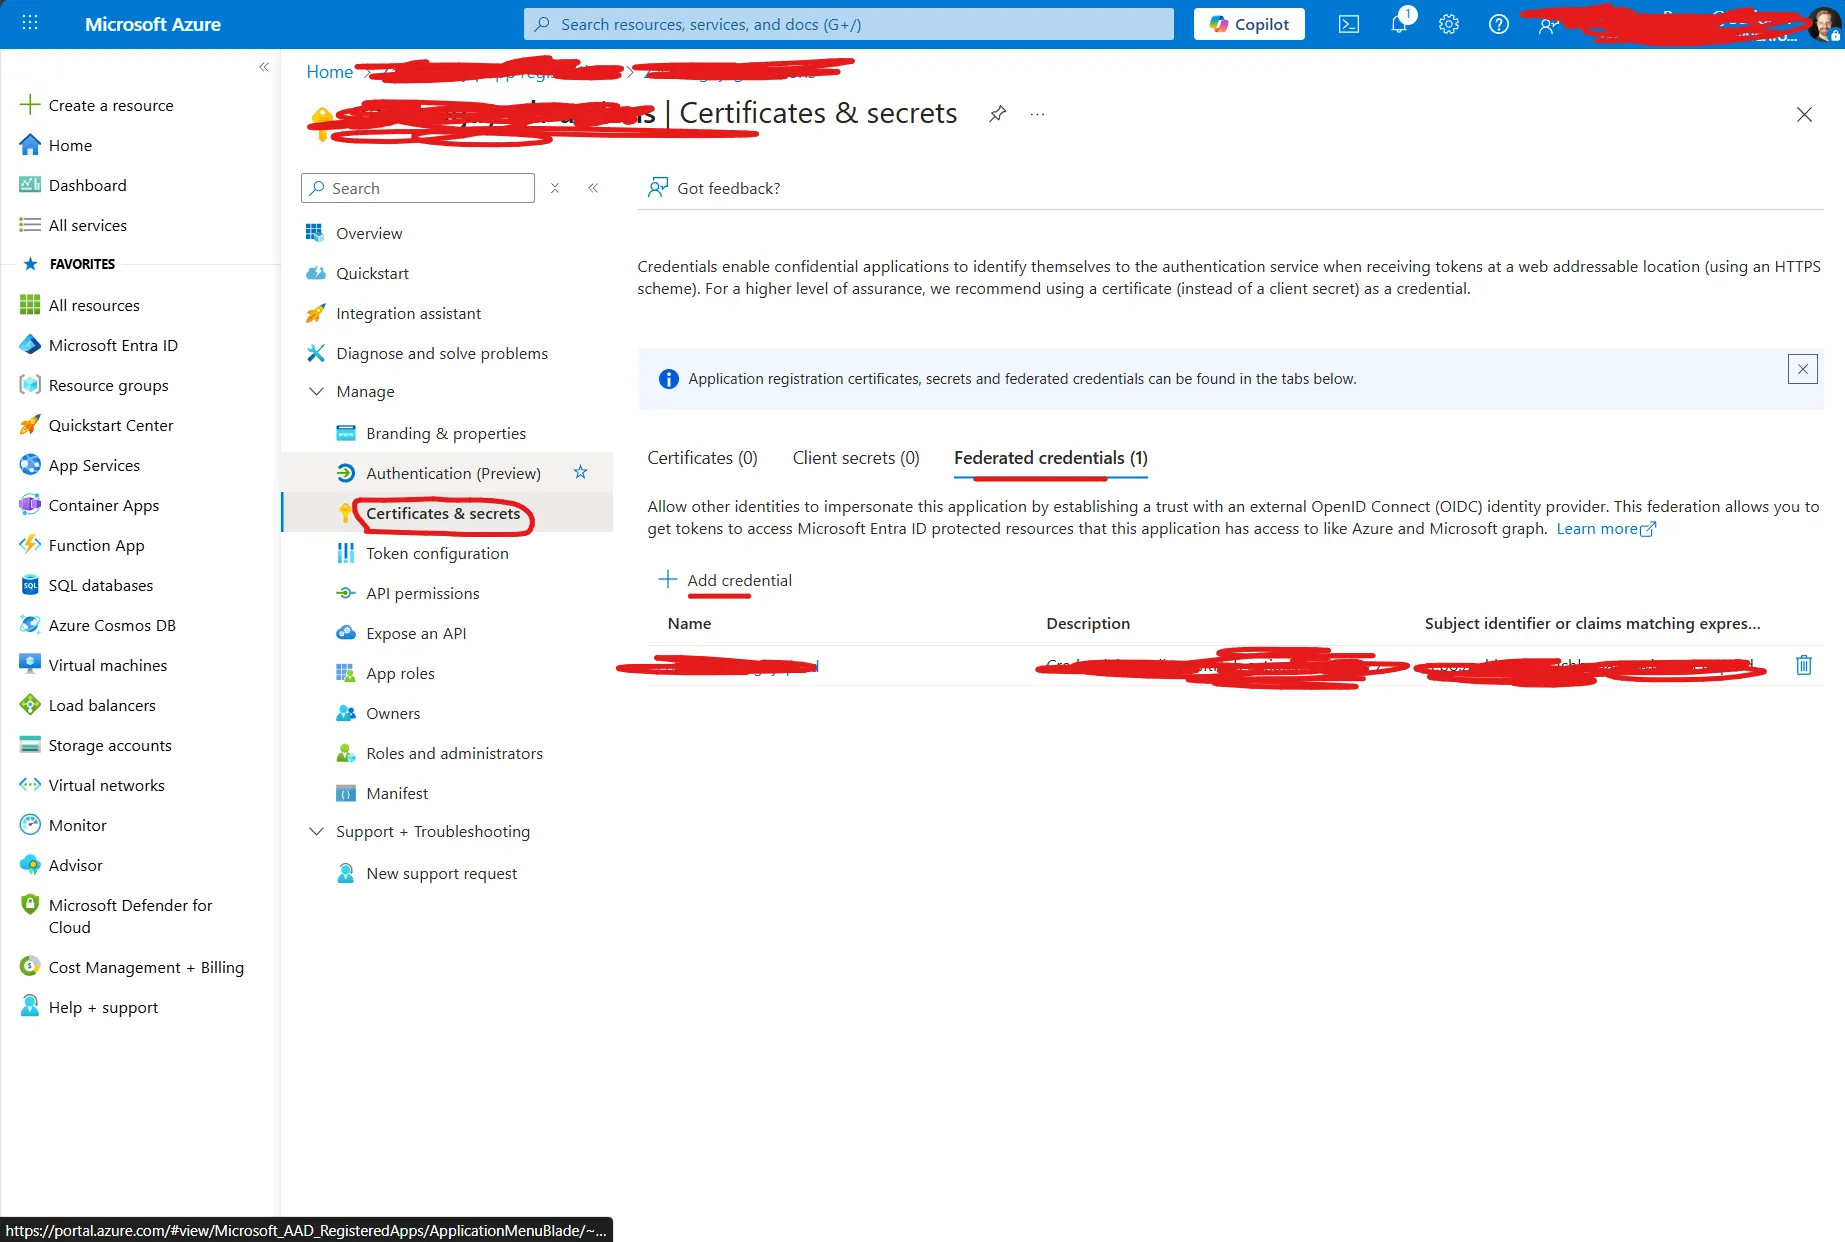
Select “GitHub Actions deploying Azure resources” scenario, and fill out the rest of the information. Under the “Entity” type you can select whichever scenario you want, but I went ahead with “Environment”. We’ll be creating this in GitHub after this. As you can guess, the environment name will be “prod.”
Select create, and wait for Azure to provision the new Application Registration.
Now, grab the following properties and put them in a README, or text document, or something to keep track of them. We’ll be needing them for another step:
- Application (client) ID
- Directory (tenant) ID
- Subscription Id for your Azure Subscription (found in the Portal)
- Object ID of the Enterprise Application we just created.

Setup GitHub
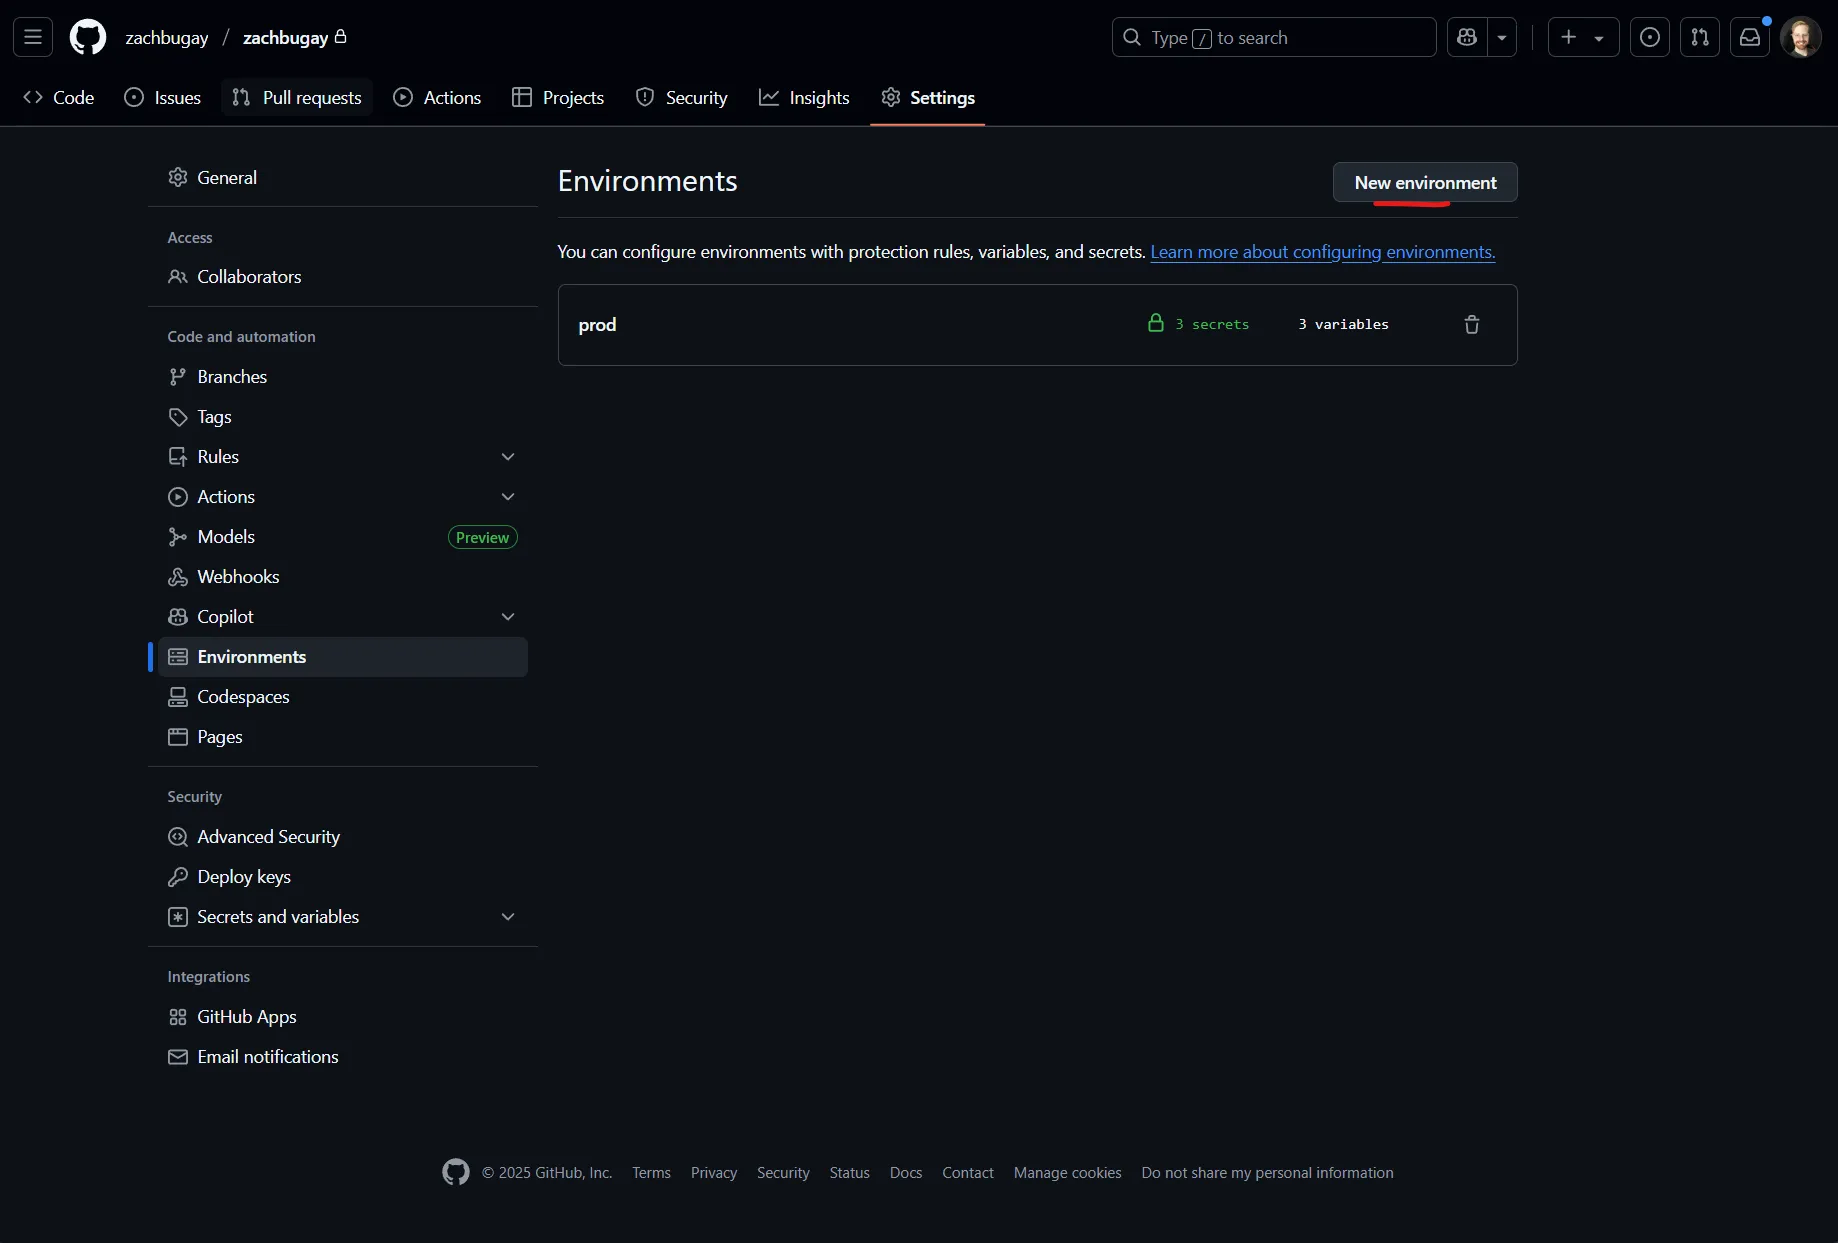
Go to GitHub, select your Repository, click “Settings.” On the left hand site, select the “Environments” blade. Click on “New Environment” to create a new environment. Name the environment “prod”
Add the stored properties from the previous steps as Environment Secrets.
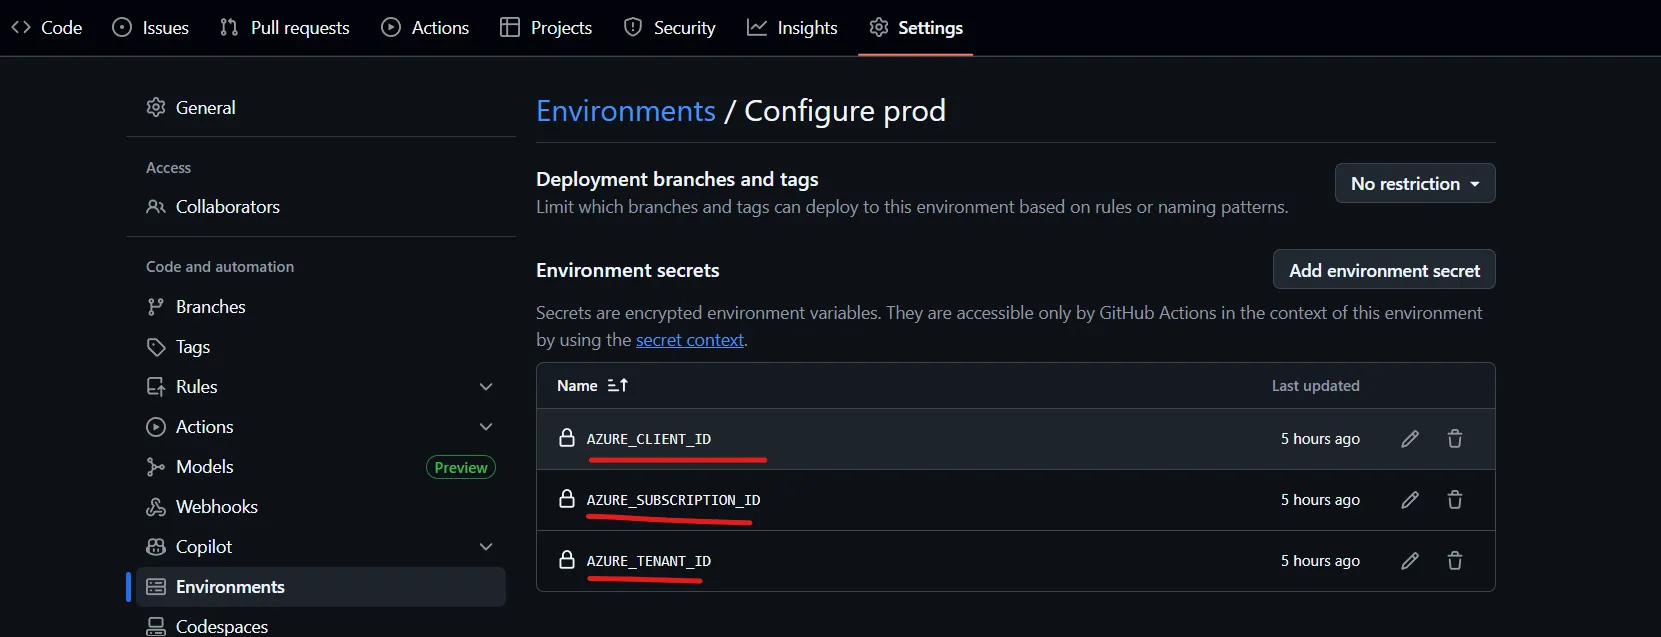
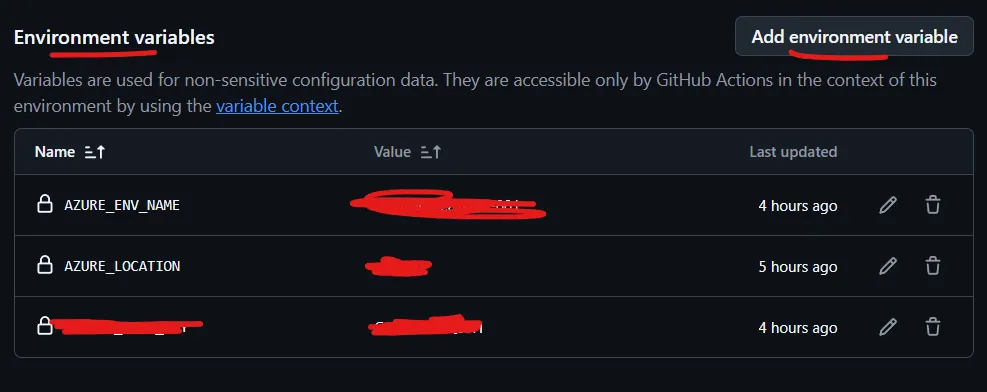
Add the appropriate GH Environment Variables that you may need, which are separate from secrets.
I have these configured:
- AZURE_ENV_NAME:
dev - AZURE_LOCATION:
eastust2
Setup Complete
Within Azure, we created an Application Registration and created Federated Credentials enabling a GitHub account to connect to this Azure Cloud instance and provision resources.
Within GitHub, we’ve added an Environment to our repository, added some secrets, and environment variables. We’re almost ready to roll.
Command Line Go-Go
$tenantId="Enter Your Tenant Id"
$assignee="Enter Your Enterprise Application Object ID"
$subscriptionId="Enter your Azure Subscription ID"
$clientId="Enter your client id"
Login to Azure using the Azure CLI (Make sure you have a Privileged Account where you can assign roles to other Users)
We want to assign the role “Contributor” to the Service Principle (Application) we just created in Entra.
az login --tenant $tenantId
az role assignment create --assignee $assignee `
  --role Contributor `
  --scope "/subscriptions/${subscriptionId}"
az role assignment list --output table
You should see the Contributor role on the the App Registration we created.
In your Repo
Now, we’ve just got to code some stuff together. In your local git repo, run the following:
azd init -t hello-azd # Initializes Within .github/workflows create a yaml file azure-dev.yml and populate it:
# .github/workflows/azure-dev.yaml
on:
  workflow_dispatch:
  push:
    # Run when commits are pushed to mainline branch (main)
    # Set this to the mainline branch you are using
    branches:
      - main

# GitHub Actions workflow to deploy to Azure using azd
# To configure required secrets for connecting to Azure, simply run `azd pipeline config`

# Set up permissions for deploying with secretless Azure federated credentials
# https://learn.microsoft.com/en-us/azure/developer/github/connect-from-azure?tabs=azure-portal%2Clinux#set-up-azure-login-with-openid-connect-authentication
permissions:
  id-token: write
  contents: read

jobs:
  build:
    runs-on: ubuntu-latest
    environment: prod
    env:
      AZURE_CLIENT_ID: ${{ secrets.AZURE_CLIENT_ID }}
      AZURE_TENANT_ID: ${{ secrets.AZURE_TENANT_ID }}
      AZURE_SUBSCRIPTION_ID: ${{ secrets.AZURE_SUBSCRIPTION_ID }}
      AZURE_ENV_NAME: ${{ vars.AZURE_ENV_NAME }}
      AZURE_LOCATION: ${{ vars.AZURE_LOCATION }}

    steps:
      - name: Checkout
        uses: actions/checkout@v4

      - name: Install azd
        uses: Azure/setup-azd@v2

      - name: Log in with Azure (Federated Credentials)
        if: ${{ env.AZURE_CLIENT_ID != '' }}
        shell: pwsh
        run: |
          azd auth login `
            --client-id "$Env:AZURE_CLIENT_ID" `
            --federated-credential-provider "github" `
            --tenant-id "$Env:AZURE_TENANT_ID"

      - name: Provision Infrastructure
        run: azd provision --no-prompt
        env:
          AZD_INITIAL_ENVIRONMENT_CONFIG: ${{ secrets.AZD_INITIAL_ENVIRONMENT_CONFIG }}

      - name: Deploy Application
        run: azd deploy --no-prompt
Once you commit (in our case to main) you should see your actions publish successfully.